Two years ago I took a workshop to make a springback journal. Even though I really liked the outcome, it felt kind of complicated to make at home. It is not an easy structure and I was too "green" to make a new one.
Last year I started one, but never finished it because I didn't like how it was looking.
But this year I learnt from last year's mistakes and gave it a new try and today I'd like to show you the process and the outcome.
I started by sewing the signatures with the cotton bands.

That's how the endpapers looked.

Here the book has already been trimmed and rounded.

I applied a first thin cover with a cardboard of 1.5 mm

Then, I put a second thin cover, this one made of Murano card. I didn't glue neither the spine nor 1 cm on each side.

I started applying thickness on the spine to compensate the thickness of the final cover.

Then I put some faux nerves and the thick final cover. The structure was complete. Here I was about to apply paste to glue the leather.

Spine and covers already covered...

Once the leather was glued and dried, I gilded a decoration on the cover and gave the final touches to the leather with the burnisher. This is the final result:


The springback is known for its easy opening.
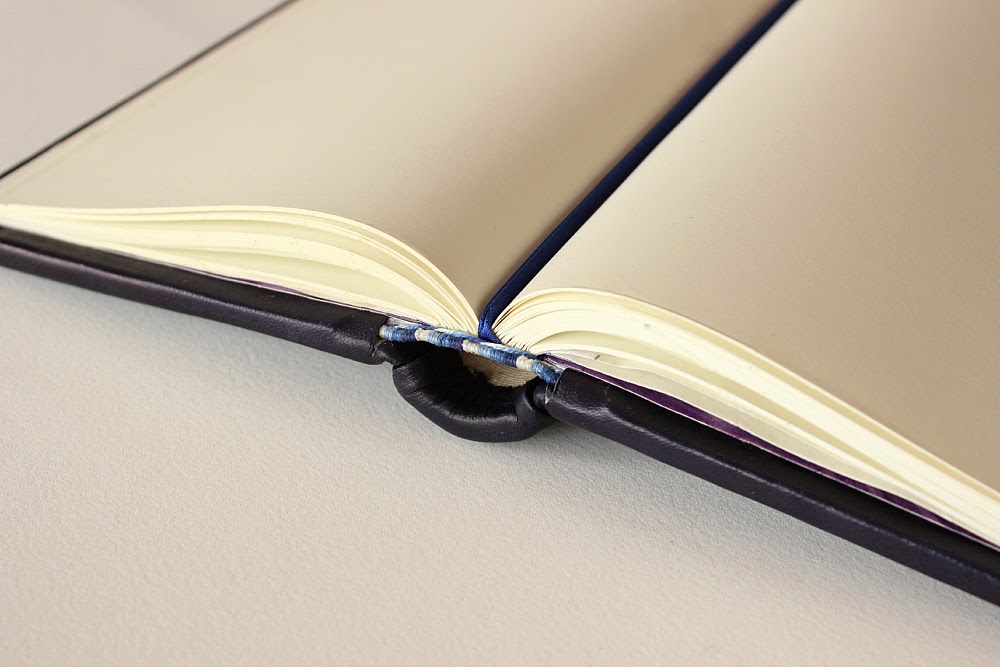
Handsewn headbands.


The endpapers are made of paste paper, which I decorated myself earlier.


This time I do feel quite happy with the results. I am glad to say I no longer fear making more of this!
I hope you liked this post. Have a nice week!
Anna
No hay comentarios:
Publicar un comentario