miércoles, 29 de mayo de 2013

GatzBcn's catalogue

As some of you may know, I have a bookbinding shop called GatzBcn. In GatzBcn I make custom items and personalized journals, and for that reason I have decided to make a catalogue so that the customer knows all the options for the journal. 

Paper
The number of pages for each book is up to the customer. The journals already made have 80 pages, 160 counting both sides. However, it is possible to add or subtract pages according the customer's wish.
For the body of the book we use Kimberly Classic paper. It's a paper slightly textured, of 90g of weight and ivory color. The paper is blank, so it doesn't have lines or squares. I also have other types of papers, like Ingres Fabriano of 90 and 120g. If the customer wishes or requires, the signatures can be made with the most convenient paper according the use that will have the book and the customer's preferences.

Size
GatzBcn has four "standar" sizes: small, medium, large and XL. The small size is 14'5x9'5 cm (5 3/4 x 3x3/4"); the medium is 18x11 cm (7 x 4 1/3"); the large is 22'5x15'5 cm (9 x 6"), and the XL is 20'5x22'5 cm (8 x 9").
However, these sizes are just guides: the customer can choose the sizes for his/her book.

Bookbinding models
  • Journal in leather with longstitch/linkstitch
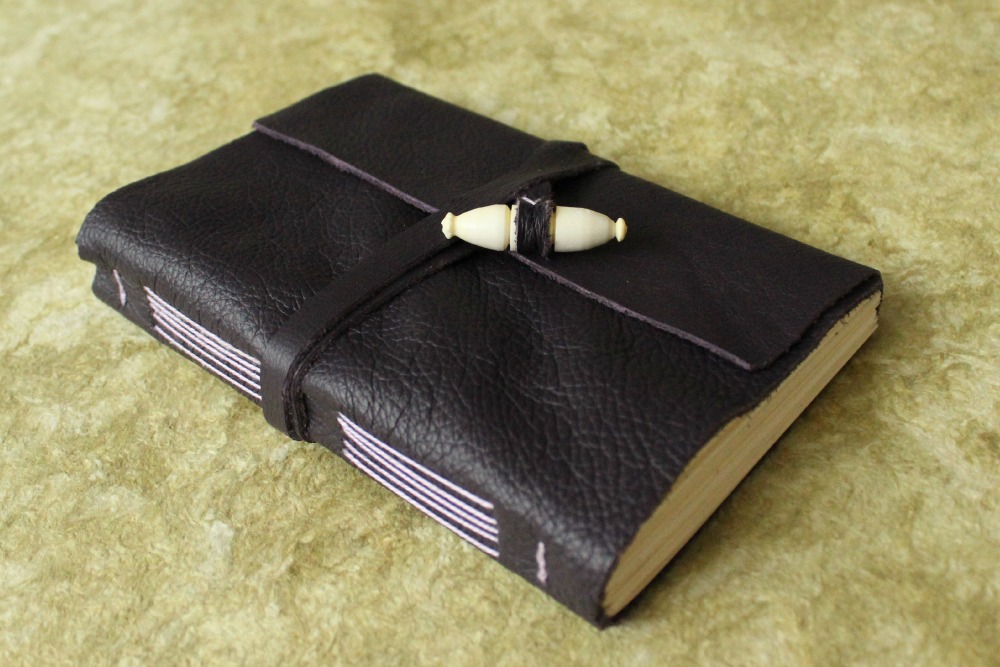


This type of journals admits a lot of personalization. The lines and "drops" of the spine that give that name to the bookbinding can vary a lot: simple horizontal lines, double horizontal lines, circles, drop lines, etc. They can be made with cow or sheep leather. The journals have a strap that serves as a fastener, which finishes with a piece of bone or metal with motives, upon choice. Moreover, we have many colors, so that the customer can choose according his or her preferences. 

  • Leather journal with crossed stitch


Leather journal following a medieval style. It has a leather strap that serves as a fastener, which finishes with a piece of bone or metal with motives, upon choice. Moreover, we have many colors so that the customer can choose his or her favourite. 
  • Basic journal in fabric or leather


These books are made with fabric or leather, which you can choose from a variety of colors. In the first image, the book was made entirely with fabric; while in the second one, a part of the front cover is made with decorated paper. The customer can also choose marbled paper made traditionally, like the one in the last image. The customer can choose, also, the endpapers for his or her book.


  • Secret Belgian journal in fabric or leather
 
This type of binding so little known can be made, like the basic one, in full fabric or fabric and paper or leather. We have many colors so that the customer can choose his or her favourite. Also, the endpapers and the color of the thread.

  • Coptic stitch journal
 

This type of binding has an exposed spine. It can be made with fabric, marbled papers or leather. Also, the endpapers and the color of the thread can be choosen. 

  • Pocket journal with exposed stitch

Those journals have a magnet in the flap so that they remain closed. They are made in fabric or leather. We have many colors for the fabric and the thread, and many types of endpapers to satisfy the customer. 
  • Japanese journals
Japanese journals can be made with fabric or paper and fabric (Amate or marbled). There's the possibility of choosing the type of stitch: four points, kanji, hempleaf or tortoiseshell (like the one in the picture); fabric, endpapers and thread.

  • Japanese bookbinding set
  
Japanese bookbinding sets include: an account book, a guestbook, a multisection journal and a scroll. They can be made with marbled paper.

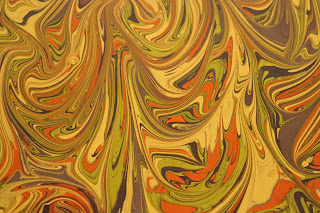
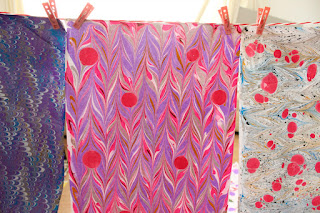
Marbled paper


domingo, 26 de mayo de 2013

Catálogo de GatzBcn

Como algunos de ustedes deben saber, tengo una tienda de encuadernación llamada GatzBcn. En GatzBcn me dedico a realizar encargos y encuadernaciones personalizadas, por lo que he decidido hacer un catálogo para que el cliente sepa todo lo que puede escoger con el fin de satisfacer todas sus necesidades.

El papel
El número de hojas que cada encuadernación tenga es a gusto del consumidor. Las libretas ya elaboradas cuentan con 80 hojas, es decir, 160 páginas. Sin embargo, es posible añadir o restar hojas según lo requiera el consumidor. 
Para el cuerpo de las encuadernaciones se utiliza el papel Kimberly Classic. Es un papel ligeramente verjurado, con un gramaje de 90 g. y de color ahuesado. El papel es liso, por lo que no tiene líneas ni cuadrículas. Asimismo, dispongo de otro tipo de papeles, como Ingres fabriano de 90 y 120g. Si el consumidor lo desea o requiere, se pueden elaborar los cuadernillos con el papel más ajustado al uso que se le va a dar a la libreta y al gusto del cliente.

El tamaño
GatzBcn cuenta con cuatro tamaños "estándar": pequeño, mediano, grande y XL. La medida pequeña hace 14'5x9'5 cm; la mediana 18x11 cm; la grande 22'5x15'5 cm y la XL 20'5x22'5 cm. 
Sin embargo, estas medidas son sólo orientativas: el consumidor puede escoger las medidas que desee para su libreta. 

Modelos de encuadernación 
  • Libreta de piel en cosido longstitch/linkstitch


Este tipo de libretas admiten mucha personalización. Las líneas y las "gotas" del lomo que dan nombre a la encuadernación pueden variar mucho: líneas horizontales simples, líneas horizontales dobles, círculos, líneas de gotas, etc. Pueden elaborarse en piel de res o de borrego. Cuentan con una cinta que sirve como cierre, la cual está rematada con una pieza de hueso o de metal con motivos, según se escoja. Además, se dispone de diversos colores para que el cliente elija el que prefiera.

  • Libreta de piel en costura cruzada


Libreta hecha en piel estilo medieval. Cuenta con una cinta que sirve como cierre, la cual está rematada con una pieza de hueso o de metal con motivos, según se escoja. Además, se dispone de diversos colores para que el cliente elija el que prefiera.
  • Libreta básica en tela


Esta encuadernación está elaborada con tela, de la cual se pueden elegir diversos colores. En la primera imagen, la libreta se realizó completamente en tela; mientras que en la segunda, una parte de la portada está hecha con papel Amate. El papel Amate es un papel tradicional mexicano que se elabora artesanalmente. También se puede optar por un papel marmoleado decorado de manera tradicional, como el que se muestra en la última imagen. El cliente puede elegir, asimismo, las guardas de la encuadernación.
El papel Amate está sujeto a disponibilidad.

  • Libreta de tela en costura belga secreta


Esta encuadernación tan poco conocida se puede realizar, igual que la básica, en tela completa o con tela y papel (amate o marmoleado tradicional). Contamos con varios colores para que el cliente escoja su preferido. De igual forma se pueden elegir las guardas y el color de los hilos.
El papel Amate está sujeto a disponibilidad. 

  • Libreta con costura copta


Este tipo de encuadernación lleva el lomo expuesto. Se puede realizar con tela o con papel decorado (marmoleado). Además se pueden elegir las guardas de la encuadernación y el color de los hilos.

  • Libreta de bolsillo con costura expuesta
 

Estas libretas llevan un imán en la solapa para que permanezcan cerradas. Se realizan en tela. Contamos con varios colores de tela y de hilo, además de diversos tipos de guardas para satisfacer al cliente.
  • Libreta de tipo japonesa

Las libretas de estilo japonés se pueden realizar en tela o tela con papel (amate o marmoleado tradicional). Existe la posibilidad de escoger el tipo de costura: cuatro puntos, kanji, hoja de bambú o caparazón de tortuga (como la de la foto); tela, papel, guardas y color de hilo.

  • Set de encuadernación japonesa
Los sets de encuadernación japonesa incluyen: un libro de cuentas, un libro de visitas, una libreta multisección y un rollo. Se pueden realizar con papel decorado (marmoleado). 

Papel marmoleado


miércoles, 22 de mayo de 2013

Heraldry Books - Libros con heráldica

What is a heraldry book? It's a book that has as a central element of decoration an coat of arms, an emblem or a symbol that identify the author or the owner of the book. This symbols achieved high importance because they were used as a social distinction for their owners. These type of books were owned by the nobility and the royal family. Today I'll show you some examples of these books.

¿Qué es una encuadernación heráldica? Es un libro cuyo elemento decorativo central es un escudo de armas, un emblema o un motivo que identifica al autor o el propietario del libro. Estos símbolos adquirían mucha importancia, ya que se utilizaban para distinguir socialmente a sus propietarios. Los propietarios de este tipo de libros eran miembros de la nobleza o la realeza. Hoy voy a mostrar algunos ejemplos de estos libros.


Title: Tractatus de Duello
Author: Diego del Castillo de Villasante.
Place and time: Spain, 1525.
Market price: 14.000 €.
Description: it belonged to Luis Benavides Carrillo de Toledo III (1608-1668), marquis of Caracena. It was probably bound in Milan or Brussels. The marquis' library had ~6000 books and it was sold by his descendants in the 19th century in Madrid.

Título: Tractatus de Duello
Autor: Diego del Castillo de Villasante.
Lugar y tiempo: España, 1525.
Precio de mercado: 14.000 €
Descripción: perteneció a Luis Benavides Carrillo de Toledo III (1608-1668), marqués de Caracena. Probablemente fue encuadernado en Milán o Bruselas. La biblioteca del marqués tenía unos 6000 libros y fue vendida por sus descendientes en el siglo XIX en Madrid.


Title: Khpykeion sive legationum insigne in duos libros distributum
Author: Fred Marselaer.
Place and time: Antwerp, 1618.
Market price: 4.000 €.
Description: the heraldic symbol belongs to the duke of Medina de las Torres, son-in-law of Conde Duque de Olivares.

Título: Khpykeion sive legationum insigne in duos libros distributum
Autor: Fred Marselaer.
Lugar y tiempo: Amberes, 1618.
Precio de mercado: 4.000 €.
Descripción: el símbolo heráldico pertenece al duque de Medina de las Torres, yerno del Conde Duque de Olivares.

Title: Pharsalia
Author: Marcus Anneus Lucanus.
Place and time: Venice, 1511.
Market Price: 6.500 €

Título: Pharsalia
Autor: Marcus Anneus Lucanus.
Lugar y tiempo: Venecia, 1511.
Precio de mercado: 6.500 €


Title: Nueva Real Cédula de la Compañía de Filipinas de 12 de julio de 1803
Place and time: Madrid, 1803.
Market Price: 3.500 €.
Description: this book was bound by Emilio Brugalla, a notorious bookbinder.

Título: Nueva Real Cédula de la Compañía de Filipinas de 12 de julio de 1803
Lugar y tiempo: Madrid, 1803.
Precio de mercado: 3.500 €.
Descripción: este libro fue encuadernado por Emilio Brugalla, un reconocido encuadernador.


I hope you enjoyed this post and remember any comments or questions are welcome. The next post will be a tutorial on Japanese bookbinding. I will show you how to make a traditional Japanese journal of four holes. See you soon!

Espero que hayáis disfrutado de este post y recordad que cualquier comentario o pregunta es bienvenida. El siguiente post será un tutorial de encuadernación japonesa. Os mostraré cómo hacer un cuaderno japonés tradicional de cuatro agujeros. ¡Hasta pronto!

lunes, 1 de abril de 2013

Giveaway! ¡Sorteo!

Hello everyone! 

This is a small post to let you know I am holding two giveaways to celebrate that my Etsy shop will be two years old on April. For more information, follow the links.

Facebook
Prize: a set of Japanese bookbinding and a Coptic journal.
Conditions: you need to share and comment on the photo answering two questions.

Tumblr
Prize: a set of Japanese bookbinding and a journal bound in french stitch.
Conditions: reblog the image and message me a slogan for the shop.

I ship worldwide; it doesn't matter if you are in South Africa, Argentina, Canada, Australia, Japan or Norway: if you are the winner, you will get the prize. You have time to participate until April 14th and the winners will be announced on April 15th.

Also, I am offering a 15% discount on everything on my shop during the whole month of April. You only have to use the code APRIL15 when you check out.

That is the link to my shop: GatzBcn


¡Hola a todos!

Este es un pequeño post para haceros saber que estoy realizando dos sorteos online para celebrar que mi tienda de Etsy cumple dos años este mes de abril. Para más información, clica sobre el link.

Premios: un set de encuadernación japonesa y una encuadernación copta.
Condiciones: tienes que compartir y comentar en la foto contestando dos preguntas.

Premios: un set de encuadernació japonesa y una encuadernación en costura francesa. 
Condiciones: rebloguear la imagen y mandarme un mensaje a mi blog con un eslógan para la tienda. 

Mando a todo el mundo; no importa si estás en Sudáfrica, Argentina Canadá, Australia, Japón o Noruega: si eres el ganador, recibirás tu premio. Tienes tiempo para participar hasta el 14 de abril y los ganadores serán anunciados el día 15 de abril.

Además, estoy ofreciendo un 15% de descuento en todos los productos de mi tienda durante todo el mes de abril. Sólo tienes que utilizar el código APRIL15 cuando en el momento de realizar tu compra.

Éste es el link a mi tienda: GatzBcn

This is the prize of the tumblr giveaway - el premio del sorteo del tumblr.

This is the prize of the facebook giveaway - el premio del sorteo de facebook.

jueves, 21 de marzo de 2013

Japanese bookbinding tutorial - Tutorial encuadernación japonesa

As I said in the last post, this is going to be a tutorial on a type of Japanese bookbinding. However, it's not the typical Japanese bookbinding - it's a type of Japanese bookbinding called multisection journal.

Como dije en el último post, este post será un tutorial de un tipo de encuadernación japonesa. Sin embargo, no es la encuadernación japonesa típica - esta encuadernación se llama cuaderno multisección. 

Materials (check out my post for materials to have more details and know where to buy them):
  • Card
  • Paper for the covers
  • Paper for the body of the journal
  • Bookbinding glue
  • Thread

Materiales (revisa mi post sobre materiales para conocer más detalles y para saber dónde adquirirlos): 
  • Cartulina
  • Papel para las cubiertas
  • Papel para el cuerpo de la libreta
  • Cola de encuadernar
  • Hilo

Tools (check out my post on tools to know more about them):
  • Cutting mat
  • Folder
  • Cutter
  • Ruler
  • Needle
  • Press
  • Awl

Herramientas (revisa mi post sobre herramientas para saber más):
  • Base de corte
  • Plegadera
  • Cúter
  • Regla
  • Aguja
  • Prensa
  • Picahielo

Instructions:
1) Fold the paper you are going to use for the body of the journal. You will fold it in five groups of five papers each. Each one of this groups will be called signature from now on. Put them in the press. They should be there for some hours at least in order to get the best results.

2) Mark this in the paper you are going to use for the cover:
 
Cut the black squares and mark with the folder the continuous and discontinuous lines. We are going to fold them later.

3) Now it's time to cut the card. We are going to use it so that the covers have some body and strength. For that, cut the card a little bit smaller than the size of the signature; for example, 2 millimeters less per side. We need the card to fit the space I called "Size of the signature" on the sketch above. 

4) We are going to place the card on the cover paper, put some glue on the uncut corners and fold them. They will glue to the card and hold it still. Then we will put some glue on the three margins of 1 cm and fold them, one at a time. That way, we will hold still the card. 

5) The last margin, the one of 0'7 cm, will be glued to the first signature (or the last one, depending on if you are doing the front cover or the back cover):
6) Mark on the spine of the five signatures this:
7) Punch this marks with the awl in order to make holes. Be careful not to punch your cutting mat!

8) Sew following the scheme below:
Each section is a signature. Start at hole number 1, from inside the signature to outside and insert the needle in number 2. The thread will go up the surface in number 3 and inserted in number 4, and so on. You can use two separate threads for each row. Please, note that the numbers 2 & 6, 3 & 7, 1 & 9, 8 & 16, 10 & 14 and 11 & 15 are the same hole.

9) Now you have to glue the first and the last page to the covers. To do that, put some glue on the three borders of the paper and close the cover. Open it to make sure it has glued correctly and put some draft paper between the cover and the page that is now the first one, so the humidity of the glue doesn't pass to other pages.

Instrucciones:
1) Dobla el papel que vas a usar para el cuerpo del cuaderno. Lo tienes que doblar en cinco grupos con cinco hojas cada uno. Llamaremos cuadernillo a cada uno de estos grupos de cinco hojas dobladas. Ponlos en la prensa. Deberían estar en ella unas horas para conseguir los mejores resultados.

2) Marca el siguiente esquema en el papel que vas a usar para las tapas: 
Corta las esquinas que están en negro y marca con la plegadera las líneas, tanto las contínuas como las discontínuas. Así ya estará preparado para cuando tengamos que doblar los márgenes. 

3) Ahora tenemos que cortar la cartulina. La usaremos para que las tapas tengan un poco de cuerpo y fuerza. Para eso, cortaremos la cartulina un tamaño un poco más pequeño que el del cuadernillo; por ejemplo, restándole 2 mm de cada lado. Necesitamos que la cartulina no quede del todo justa en el espacio que denominé "Tamaño del cuadernillo" en el esquema. 

4) Pondremos la cartulina sobre el papel de la cubierta, encolaremos las esquinas no cortadas y las doblaremos hacia dentro. Las puntas deberían pegarse a la cartulina y mantenerla firme. Entonces pondremos cola a los tres márgenes de 1 cm y los doblaremos para que se peguen a la cartulina, de uno en uno. De esta manera nos aseguraremos que no se mueva la cartulina. 

5) El último margen, el de 0'7 cm, lo pegaremos al primer cuadernillo (o al último, dependiendo de si hacemos la cubierta o la contracubierta):
6) Marca en el lomo de los cinco cuadernillos las siguientes medidas:
7) Haz los agujeros que marcaste en el lomo de los cuadernillos con el picahielo. ¡Ten cuidado, no pinches tu base de corte!

8) Cose siguiendo el siguiente esquema:
Cada sección corresponde a un cuadernillo. Empieza en el agujero número 1, desde el interior del cuadernillo hacia fuera para insertar la aguja en el número 2. El hilo saldrá nuevament a la superfície en el número 3 y será insertado de nuevo en el número 4, y así hasta el 16. Puedes usar dos hilos diferentes para cada hilera de agujeros. Ten en cuenta que los números 2 y 6, 3 y 7, 1 y 9, 8 y 16, 10 y 14, y 11 y 15 corresponden al mismo agujero. 

9) Ahora tienes que pegar la primera y la última página a las cubiertas. Para ello, pon cola en los tres márgenes de la primera hoja de papel y cierra la tapa. Ábrela para asegurarte que se pegó correctamente y pon papel de borrador entre la cubierta y hoja que desde ahora es la primera. De esta manera, la humedad de la cola no pasará a las siguientes hojas.


Here are some images of this journals:
Aquí tienen algunas imágenes de este tipo de cuadernos: 

If you have any questions or there is something that is not clear, please let me know and I will clarify it. If you decide to make this journal, I'd love to know and to see, if possible, the results.
The next post will be about journals made with common techniques, but full of creativity!

Si tienes preguntas o hay algo que no te ha quedado claro, hazmelo saber y lo clarificaré. Si decides hacer este cuaderno, me encantaría saberlo y, si es posible, ver cómo te quedó. 
El siguiente post será sobre encuadernaciones hechas con técnicas comunes, pero llenas de creatividad.